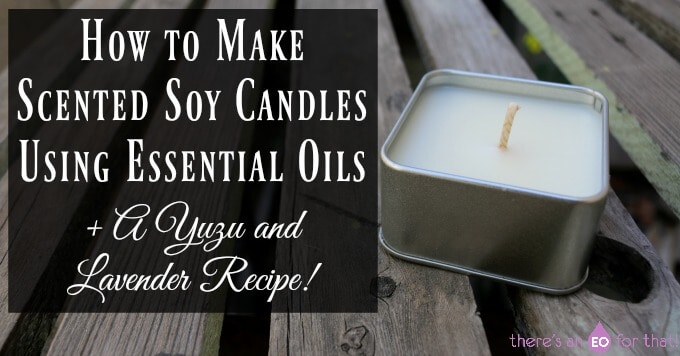
I love burning a good candle. They set the mood for any occasion making rooms inviting, cozy, and aromatic and dinner tables flicker with romance. There is almost nothing better than the ambiance a candle can bring to your home.
The downside? Buying candles is expensive! Not only that, most candles on the market (including that $5 bag of tea lights) are filled with toxic paraffin wax, a by-product of petroleum processing.
Petroleum wax begins its refinement process as the black sludge found in crude oil barrels. Have you ever smelled the noxious stench of fresh asphalt being laid? Believe it or not, that is extracted BEFORE paraffin wax in the refining process.
The black sludge that’s left is then bleached and further “refined” with benzene, toluene, and various colorants and fragrances to produce a marketable product, namely all those pretty candles you see gracing the shelves of popular candle shops you see at the mall.
These candles, when burned, are known to release carcinogenic compounds into the air essentially poisoning the air you breathe.
After I learned this rather sobering fact, I started throwing out my candles and looking for natural alternatives.
Hands down, the best option is pure beeswax candles! And while I dearly love the delicious scent of warm beeswax in my home, I wanted something a little more scented. Sure, you can buy all-natural scented candles, but they do tend to be pricey!
Not to mention beeswax doesn’t hold onto the fragrance of essential oils as well as pure soy wax does. So, while I still absolutely love my beeswax candles, I knew it was time to experiment making my own scented soy candles.
And that my friends, is what we’re learning how to do today!
How to Make Scented Soy Candles Using Essential Oils
Making your own soy candles is just about as easy as making a salve. You just have to melt the wax, stir in some essential oils, and pour. It really couldn’t be easier!
However, there are, of course, a few pro tips and safety measures to consider, so I’ll go over those here:
1. Line your workspace with newspaper, foil, or wax paper. This makes any spills a breeze to clean up!
2. You MUST use the double boiler method for making any type of candle. Wax can very easily catch on fire if you heat it directly in a pot or pan on the stove. You must put the wax in a specific double boiler or in a heat-resistant pyrex measuring cup that is sitting either in or above water. Refer to my photos to see how I did this.
3. NEVER use a microwave to melt any type of candle wax as it can catch on fire!
4. Use a flake of wax to secure the tab at the bottom of the wick to the bottom of the jar/tin you are using for the candle. You can use the end of a chopstick to really press it down.
5. Use a chopstick, pencil, or skewer to gently hold the wick in place. You want it centered and straight. If you have any bends in the wick, your candle will not burn correctly and could even break your glass container. Make sure the wick is pulled taught and is as centered as you can get it.
6. That said, make sure to use safe containers for burning candles. Do not use super cheap glass jars, plastic containers, or wood as those can crack, melt, or catch on fire. Opt for higher quality mason jars/glass containers or metal tins. If you are unsure about the strength and resilience of your chosen container, either avoid using it (better safe than sorry!) or take safety measures while burning the candle. To do this, completely line a baking sheet with foil to catch any spillage. Place the candle in the center and burn it while at home where you can keep an eye on it. It’s up to you to determine if it’s safe or not – there is no point in risking a house fire just because the container is pretty!
7. Always test your candles before giving them away as gifts.
8. Never pour leftover wax down the drain when cleaning up. Simply use some paper towels to wipe away excess wax once it’s cooled a bit to avoid any unnecessary burns. Trying to wash hardened wax is a real chore, so I suggest either wiping it away OR re-melting the excess, allowing it to cool a bit, then placing it in the freezer. The cold temperature will cause the cooled wax to pull away from the edges and you should be able to just pop it out. This is a great way to safe excess wax for future use!
9. Never cool candles in the fridge or freezer to speed up solidification. This will only cause your candle to crack or shrink.
10. And lastly, if you do somehow catch the wax on fire during the melting process, for all that is holy, DO NOT try to put out the flame with water unless you want a super explosion in your kitchen. I’ve also read that fire extinguishers don’t work very well either, so let’s just practice safety, shall we? This means keeping an eye on the melting wax and only using a gentle simmer. Once it’s completely melted, remove it from the heat to avoid any excessively high temperatures.
Alright, so now that we have gone through some tips and safety measures, it’s time to get to the fun stuff, actually making our scented candles!
How to Make Scented Soy Candles with Essential Oils
Since I enjoy swapping out scents fairly often depending on my mood, I like to make just one to two candles at a time. You can, of course, make as many of the same scent as you like!
You will quickly find scents you truly enjoy and will want to give out to friends and family as gifts.
The best part? Making your own soy candles is a fraction of the cost of store-bought candles AND are much safer to your body and the environment.
How to Measure the Proper Amount of Soy Wax for Candle Making
The key is to determine how many grams of wax your chosen candle container will hold. Since the volume of water and melted soy wax is different, you will need to calculate how much you actually need.
If you’re wondering about the water, stick with me here as it’s the best way to figure out how much wax you will need for pretty much any container you choose for your candle.
All you need to do is place the desired container on an accurate kitchen scale, select the weight in grams, press tare, then fill the container of choice with water, leaving a little bit of space at the top. This will give you the weight of the water in grams.
Take that number and multiply it by 0.85 (this is only applicable to pure soy wax)
Take the number you get and multiply it by the number of containers you want to fill (assuming they are all the same) to get how many grams of soy wax you need.
For example, the tin I chose for my yuzu lavender soy candle is 4oz.
I filled it with water, about ¼ inch from the top. This measured out to be 88g of water on my kitchen scale.
88 x 0.85 = 74.8g, so I’m just going to round up to 75g to make things simple.
If I wanted to make 3 candles, I would multiply 75 x 3 to get 225g.
I would then measure out 225g of soy wax for melting to get the perfect amount of wax.
Easy peasy!
How to Measure the Proper Amount of Essential Oils
You will need 6-10% essential oils to make a nicely scented soy candle.
For a 6% dilution, you will need to add 270 drops of essential oil.
I recommend doing this because there is nothing worse than a candle that is either not scented enough or is too cloying to burn without getting a headache.
How to Make Yuzu Lavender Soy Candles
This recipe has such an amazing scent! If you have never smelled yuzu essential oil, I implore you to buy a bottle this instant! There is nothing quite like the beautiful full-bodied, bright, tangy, and sweet aroma of this exotic Japanese citrus.
Yuzu is known to promote feelings of cheerfulness, happiness, and a sense of wellbeing.
The lavender I chose to use in this blend is called “fine lavender” which is a lavender that is grown in higher altitudes that produces a more refined and complex scent than other lavender essential oils.
Lavender is known to promote feelings of calm and relaxation and helps relieve stress and nervous tension.
It’s the perfect combo for mood elevation!
To make one yuzu lavender soy candle, you will need:
• One 4oz candle tin
• Candle wicks with wick holders
• An accurate kitchen scale
• A calculator (I just used my phone)
• A saucepan
• A pyrex measuring cup (or other heat resistant container for melting)
• Some newspaper
• 75g of 100% pure soy wax
• 135 drops yuzu essential oil (can sub with lemon)
• 135 drops fine lavender essential oil (can sub with lavender)
Feel free to multiply this recipe as needed.
Loving Preparation – Yuzu Lavender Soy Candle Recipe
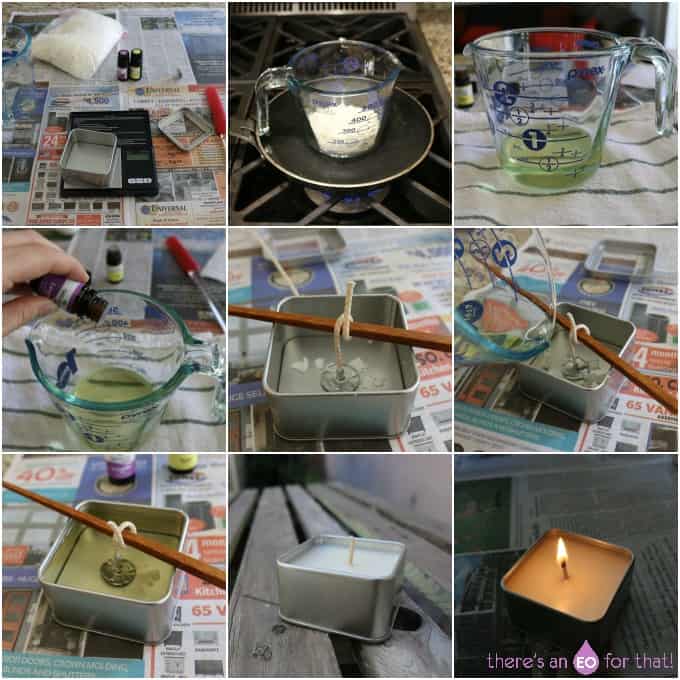
1. Begin by calculating the amount of soy wax you need for your containers using the kitchen scale, then place the wax in a pyrex measuring cup for melting.
2. Next, calculate how many drops of essential oils you need to get a 6-10% dilution.
3. After that, bring one inch of water to a gentle simmer in a saucepan and place the pyrex measuring cup with the soy wax in the center.
4. Use this time to lay out a sheet of newspaper and get your candle tin ready by getting the wick placed. Use a chopstick to keep the wick taught when you pour the wax.
5. Once the wax has melted completely, remove the pyrex from the heat, place it on a kitchen towel on the counter to dry off any water droplets, and allow it to cool a bit.
6. At this point, thoroughly mix the essential oils into the wax, then pour the final product into the candle tin.
7. Allow the candle to solidify completely, then carefully trim the wick (keep it about ½ an inch long)
Soy Candle Troubleshooting
- Shrinkage
If your candle is pulling from the edges of the container it means that the container stayed too cool while the candle solidified. You can remedy this by loosely wrapping a towel around the candle while it cools.
- Cracking
If your candle develops cracks on the surface, simply use a hair dryer to smooth the wax. You may want to do this if you’re giving the candle as a gift. Cracking is a result of cooling too quickly.
- Curdling
If your candle has a really strange texture, you may have added too much essential oil. Some waxes can take up to a 12% dilution, but soy usually takes 6-10%.
- Tunneling
If your candle burns down in a narrow tunnel and not to the edges of the container it means you need to use a larger wick size. I recommend sizing up by one and seeing how that burns. Another reason for tunneling is blowing out the candle too soon. You want to burn candles at least until the entire surface is melted before extinguishing it.
- Weak Aroma
The essential oils you used may have a low flash point and may have evaporated too much before solidification was complete OR you didn’t add enough essential oils.
- Too Much Candle Smoke
This means that your wick is too long. Trim it down so it’s between a ½-¼ inch long.
I hope you enjoyed this little tutorial on how to make your own scented soy candles! Have you ever made candles before? Please share your favorites in the comments below!
You may also enjoy reading:
Highland Mint Body Lotion
DIY Smith’s Rosebud Salve
Chai Rose Lip Balm Recipe


Kate says
I really love this blog. I'm experimenting with DIY candles after throwing all of my paraffin/chemical drenched ones away. I first considered using beeswax, but aside from the expense and the fact that it can't really retain a scent, it is often cruelly derived, and I prefer using something vegan. Then the idea of using soy occurred to me, however, I was put off by the problem of deforestation that this crop presents. So finally I settled on a coconut wax, as it is not only sustainable but cruelty free, holds onto scent better, and lasts longer than pure soy from all I've read. The kind I am trying is 90% coconut with a smidge of soy and palm blended in. I'd prefer to use essential oils too but wow, it's an incredibly expensive proposition as you need to use a lot, and these weensy bottles aren't cheap.
Now I'm into heavily researching fragrance that is supposedly naturally derived, and checking out ISO certified oils that can only be derived from natural ingredients in order to call themselves natural. I'd eventually want to try to sell them if they turn out well. I've been hoping to find a solution that doesn't harm the environment, ruin anyone's health, hurt any bees or destroy precious forests. Sheez.. that's a rather tall order. So the question I have for you, did you ever or will you ever consider experimenting with those "naturally derived" fragrances? I only found one manufacturer with the ISO certification, and their line is pthalate free. It really shouldn't be this hard to create beautiful, nice smelling candles without obliterating the world's natural resources, killing ourselves, and investing a ton on the truly, 100% natural good stuff.
catriona hutton says
I am having problems with a fuel like smell when i burn my EO lemongrass candle, any advise, dont know what i am doing wrong as it previously worked ok
Michelle says
Hiya, your article is awesome and very helpful.
I have read in other articles that fractionated coconut oil is essential; is this a different method?
Any insight would be lovely, I’m making them for the teachers at my granddaughters school 🙂
Carrie says
I’m about to start making candles, this is very helpful
Carrie says
I’m about to start making candles, this is very helpful
Robyn says
An interesting and helpful post. I have never worked with soy candles and essential oils but I am about to begin. I am a potter and my plan is to throw some ceramic cups that i will use to create the candles. What is the best brand of essential oils to use?
Tash says
I really like Plant Therapy. They are high quality and easy on the wallet!
Kay says
I think this is awesome.. so 135 drop is ckose to approx. 1.5 tsps... there are about 76 drops in 1 tsp. Here i go atesting... lol.
sarah says
Isn't that many drops of essential oil equivalent to an entire 15 ml bottle? I use and love YL oils and am thinking of making soy candles with them. However, 270 drops per 4 ounce candle isn't a lucrative number. I don't want to use cheap oils or synthetic fragrances either. Kinda bummed! Great article, with lots of helpful info, thank you!
Sharon Harless says
Nice info. Thanks!
Tash says
You're welcome Sharon! 🙂